Remember your childhood, where the simplest toys brought you so much joy? Babies are enchanted by a piece of tissue paper. Pre-schoolers find endless possibilities in a cardboard box. Children marvel over the beauty of colors and light moving before their eyes with a kaleidoscope.
Revisit the simpler times of childhood. Make your own kaleidoscope with kids and bring a bit of whimsy to your life. Kaleidoscopes are one of those nostalgic toys from childhood: so simple and yet they always amaze. Kids will delight in being able to make their own and then twisting and turning it to see the blaze of color and movement before their eyes.
This project requires a bit of precision at times. If you’re crafting with a smaller child, say under 7, it may be beneficial to measure ahead of time and pre-cut materials so idle hands don’t grow too impatient.
 Supplies Needed
The supply list doesn’t call for anything hard-to-find. A well-stocked craft cupboard probably includes most items here. And the rest can be sourced in the kitchen or recycling bin. Here’s what you’ll need:
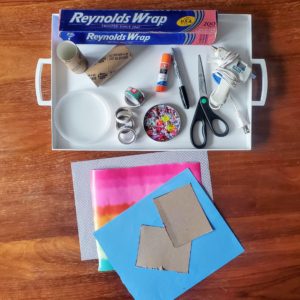
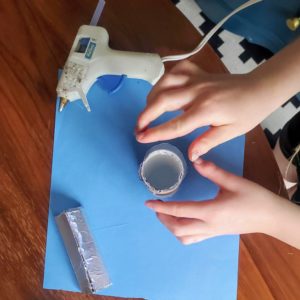
- Cardboard tube: The tube from toilet paper or paper towels will work great.
- Clear plastic: A deli lid (like from the container of potato salad) is best for this project. Or use a bit from a take-out container.
- Thin piece of cardboard: A panel from a cereal box is perfect.
- Tin foil: Just large enough to wrap your piece of cardboard.
- Colorful paper: Construction paper, wrapping paper, or scrapbook paper work fine. If you don’t have colored paper, you can use a plain sheet of white paper–just have your kiddo color / decorate it first.
- Washi tape: Optional, but fun for decorating the outside.
- Colorful beads: Small, translucent beads work best. You only need a small handful.
- Glue stick
- Hot glue gun
- Scissors
- Marker: For tracing and marking where to cut.
- Ruler: Optional, but may be helpful for measuring materials for cuts.
 Instructions
- Cut your cardboard so that you have a piece that is as long as your tube and almost three times as wide as your tube’s diameter. You’ll be folding this into a triangle shape and inserting it into the tube later. Double-check that it fits before proceeding. It’s easier to snip off extra bits now.
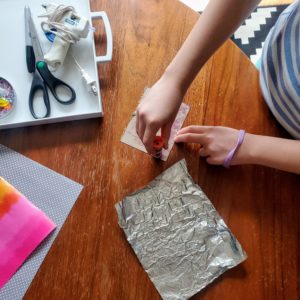
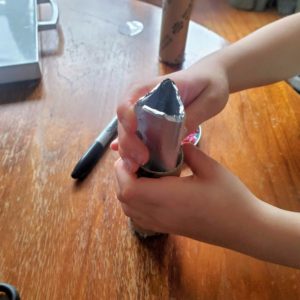
- Cut a piece of foil big enough to cover both sides of the cardboard. Using your glue stick, glue the foil onto the cardboard. Set aside your foil-wrapped cardboard for now.
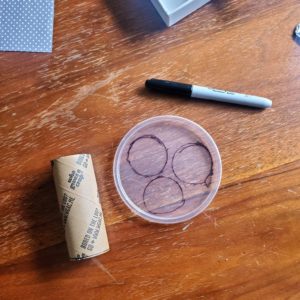
- Trace the end of the cardboard tube on your plastic three times. Cut out your three circles. Two of the circles will be glued to the ends of the tube. Trim the third until it is just small enough to slide into the tube.
- Preheat your hot glue gun. It’s time to glue some parts into place. Begin by gluing along the edge of your foil/cardboard triangle so that the sides stay together, holding its triangular shape.

- Glue one of your larger plastic circles onto either end of the tube. This will be the bottom of your tube.
- . You’ll want enough to cover most of the plastic circle but leave some wiggle room so the beads can shift as you turn the kaleidoscope.
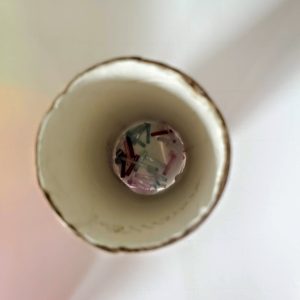
- Insert your smaller plastic circle on top of the beads. Use a pencil if you need something to poke it to the bottom.
- Insert the cardboard triangle into your tube. It should rest against the inner plastic circle. Don’t push it too tightly or it will restrict the movement of the beads. Add another ring of hot glue around the top edge, and cap it off with your final plastic circle.
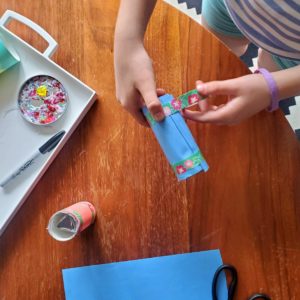
- Cut your colorful paper (or decorated white paper) so that you have a big enough piece to wrap around your tube. Use hot glue to attach the paper to the tube.

- Add washi tape to decorate the outside of the kaleidoscope even more.
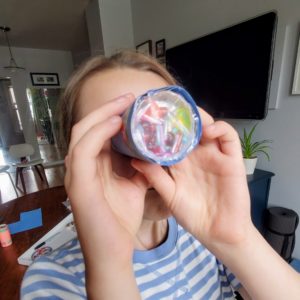
- and give it a twist. Marvel at the beautiful colors and motion.